There is a lot of answers to “how to move virtual machines between vSphere infrastructures?”. Indeed, we can move vms files or use ovfTools, but there are some solutions that allow you to do it easily with less downtime. Here I will explain how to use Veeam Backup & Replication to do it.
![]()
Overview
I have two vSphere infrastructures and I want to migrate my virtual machines from the old to the new one. In my lab, I will work on two dedicatedCloud provided by OVH. My old infrastructure is located at Roubaix and I want to migrate all my virtual machines to Strasbourg. This solution also works if I want to migrate virtual machines from my own datacenter to any other vSphere infrastructure.
As I placed my two dedicatedCloud in the same vRack, I can use a private network to transfert my virtual machines between the two infrastructure. We can also do it through a public network.
Replication infrastructure
We need two server to configure a replication job, in one site we will install a backup server, in the second site, we will deploy a backup proxy. Both of these server will be windows server virtual machines.

We will use Virtual Appliance mode to have better performances. The backup server will mount the disk of the source virtual machine and will send data to the backup proxy through the vRack. Data will be written directly in the destination vmdk.
The first step is to deploy one windows server VM on each side. Once virtual machines are ready, configure the network and check that the two servers can reach each-other.
The backup server needs to be able to reach both of the two vCenters and the sources hosts, and the backup proxy needs to reach the destination vCenter/hosts only. Using dedicated cloud, the backup server needs to join both dedicatedClouds and the backup proxy needs to join the destination one.
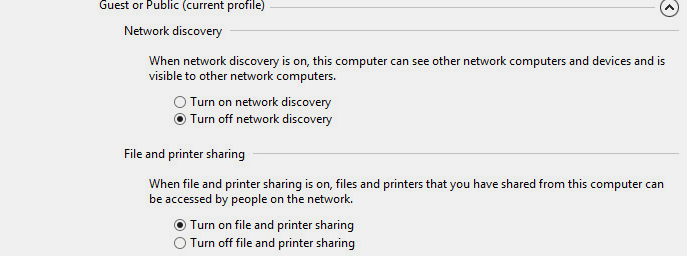
On the backup proxy, enable File and printer sharing for your connection profile. You can find this option in “Control Panel -> Network and Internet -> Network and Sharing Center -> Change advanced sharing settings”.
On the backup server, download the latest version of Veeam Backup & Replication, for this post I used an evaluation version available on the Veeam website. I installed the backup server on my old site, just follow the setup.exe to get Veeam B&R ready to use.
Initial configuration
In this part we will configure Veeam Backup & Replication.
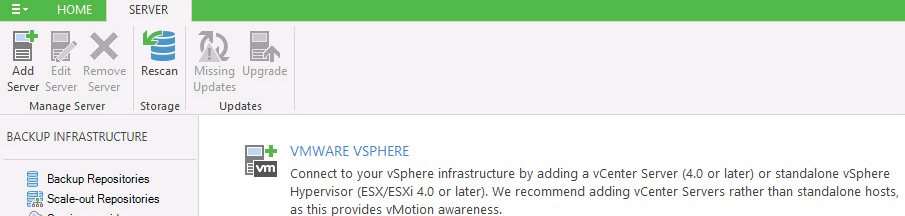
Launch Veeam Backup & Replication console and add a new VMware vSphere:
Follow the wizard and repeat the operation for the second site. You should see both of your site in VMware vSphere section:

Once both sites are configured, add a new Microsoft Windows server.
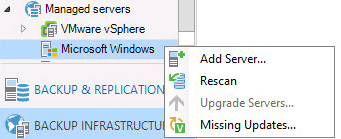
A window will open, enter the name or the ip address of the backup proxy (the windows server located on the second site), if you are in a domain, use FQDN, else, use the ip address of the server. In my case I used the IP address (192.168.1.2).
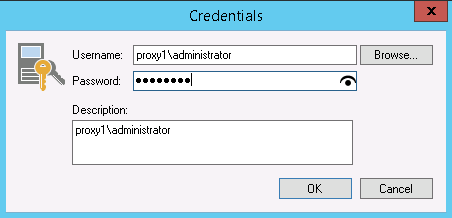
The next step is to enter credentials to connect the remote host. Take care to use the full user name, DOMAIN\USERNAME, if the server is not a part of a domain, use the server name instead.
Validate the form and follow the wizard to the end. It will check installed components and will install Veeam Transport service. If you get an error, check on the proxy that File and printer sharing is enabled on your connection profile. You might check your firewall settings also. Retry the operation. You should now see two servers in Microsoft Windows section, the one we just added, and the backup server itself.
We will now configure the proxies, go to the Backup Proxies section, you should have one server named “VMware Backup Proxy” which is the backup server. Edit this proxy and change Transport Mode settings to only allow Virtual Appliance, take care to uncheck “Failover to network mode if primary mode fails”.
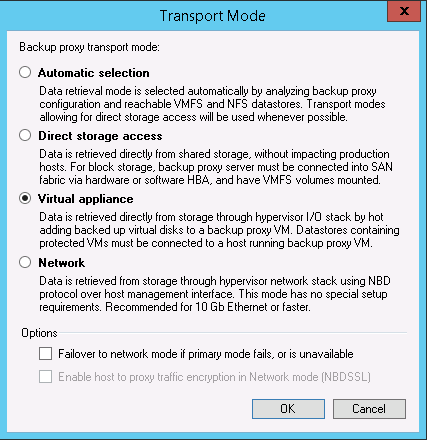
Save settings and add a new backup proxy. A wizard will open, select the proxy we just added (192.168.1.2 in my case) and customize transport mode as we just did it on “VMware Backup Proxy”. Save settings and you should see your two proxies in the Backup Proxies section.
Veeam Backup & Replication is now ready to use.
Configure the replication job
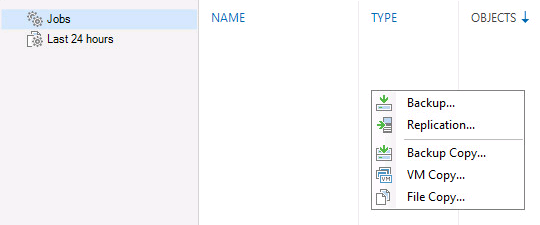
In this part we will configure the replication job, go to BACKUP & REPLICATION section and add a new replication job.
Name the job and select options you want to add, in my case I just need networks remapping as my source and destination network don’t have the same name.
On the next step, we have to add the VMs we want to replicate, click add and select your VMs.
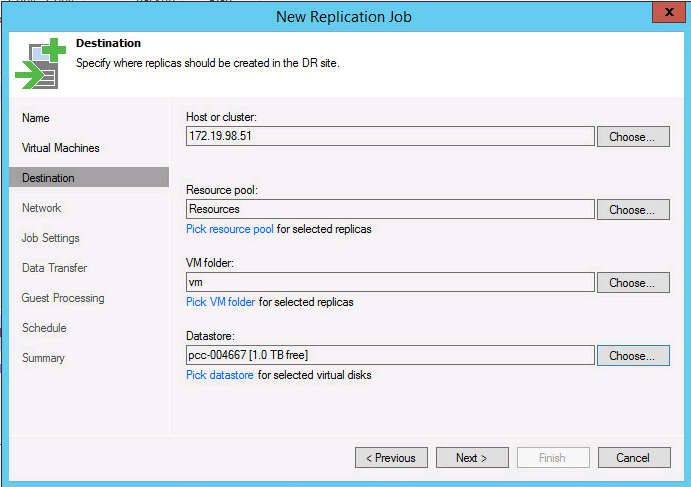
Then select the cluster you want to replicate to. If you want you can specify a resource pool, a folder and a datastore. Take care to select a datastore with enough space, Veeam will automatically select the datastore with the more free space.
If you want to replicate virtual disks on several datastores you can use the “Pick datastore” feature that allows you to distribute virtual disks on separate datastores.
On the next window, configure the network mapping, this window is only displayed if you checked out the “Separate Virtual Network” checkbox in the first step.
Then you will have to select a backup repository. In replication jobs, repository only contains metadata so you don’t to have a lot of free space. I used the integrated repository of my backup server.
The next step is to select source and destination proxies, veeam can automatically select the proxy to use but I prefer to force it. Configure “VMware Backup Proxy” as source proxy and your backup proxy as destination (192.168.1.2 in my case)
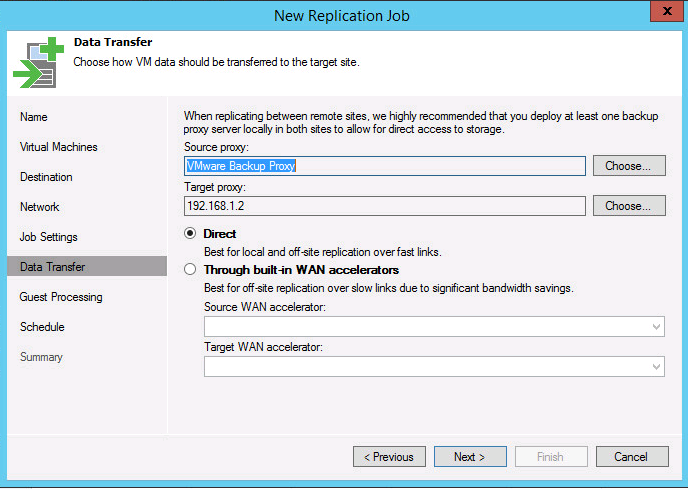
We don’t use wan accelerator here, but if you are running on a WAN connection or a slow connection, this servers can make the replication faster.
As we are moving the virtual machine, we don’t need to customize “Guest Processing”, we will shut down the source before executing the last replication.
Skip the “Schedules” steps and create the job.
Start Replication
The replication job is now ready to use, we can start it for the first replication. The first replication is a full replication, it can takes several hours depending on the amount of data to transfer. During the transfer, your production servers keep running and you won’t see any impact on your production. The only impact you may see is the impact of the VMware snapshot, it can reduce disk performances.
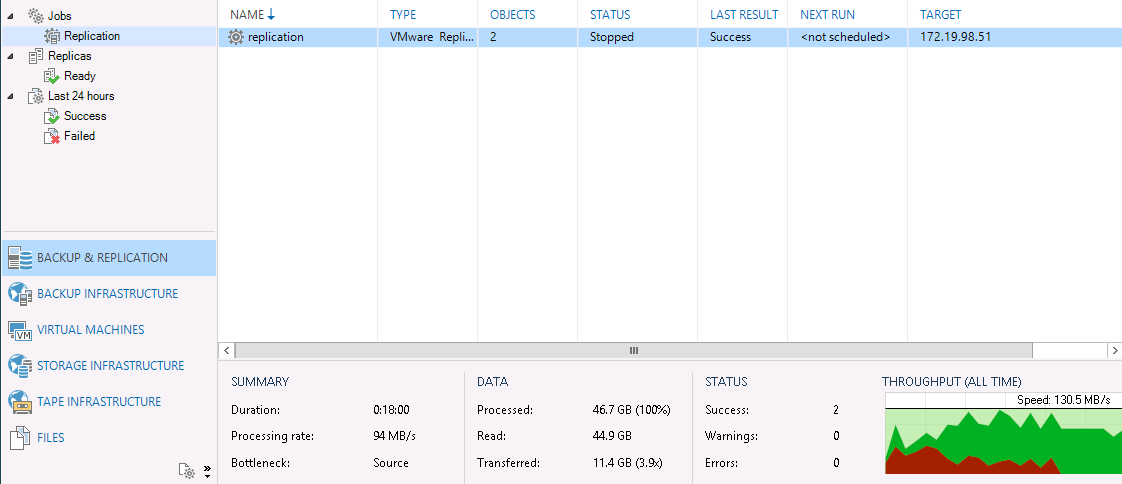
Once the first replication done, you will see all replicated VMs on the destination infrastructure, those VMs will be named with the _replica suffix.
You will see in the Replicas section your virtual machines as ready. We are now ready to failover our production to the destination infrastructure.

Failover production servers
When you are ready to migrate, run the job again to replicate the delta of data since the first replication.
Wait for completion.
Shut your production VMs down.

Run the job a last time to replicate all data left.
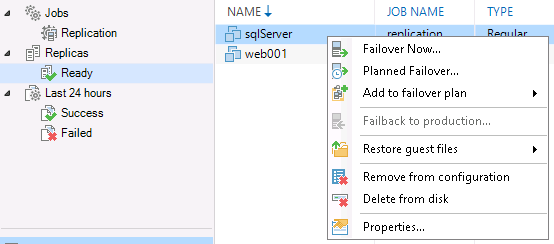
Once the job is done, go to the Replicas section and select your virtual machines in Ready sub-section. Right click on it and select failover now.
You can add several virtual machines in the failover plan. 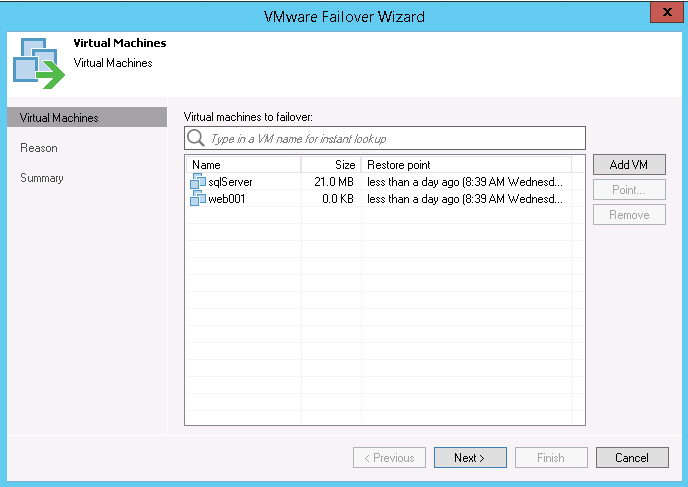
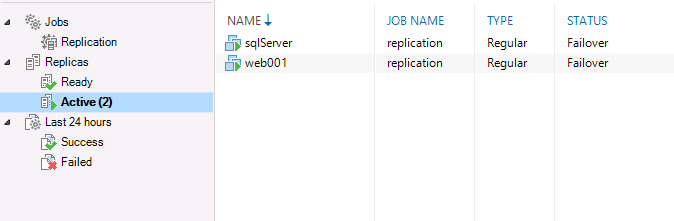
Failover jobs will start and when jobs are finished you will see your servers in the Active sub-section:
To finalize the migration, select Permanent Failover on each virtual machines
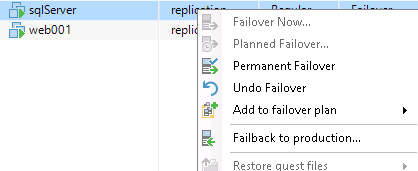
Your virtual machines will disappear from Replicas section.